Ultralight backpacking equipment: essential items for a featherweight adventure
Build a safe ultralight backpacking kit with essential gear, practical weight targets, and smart choices for lighter, more comfortable multi-day hikes.
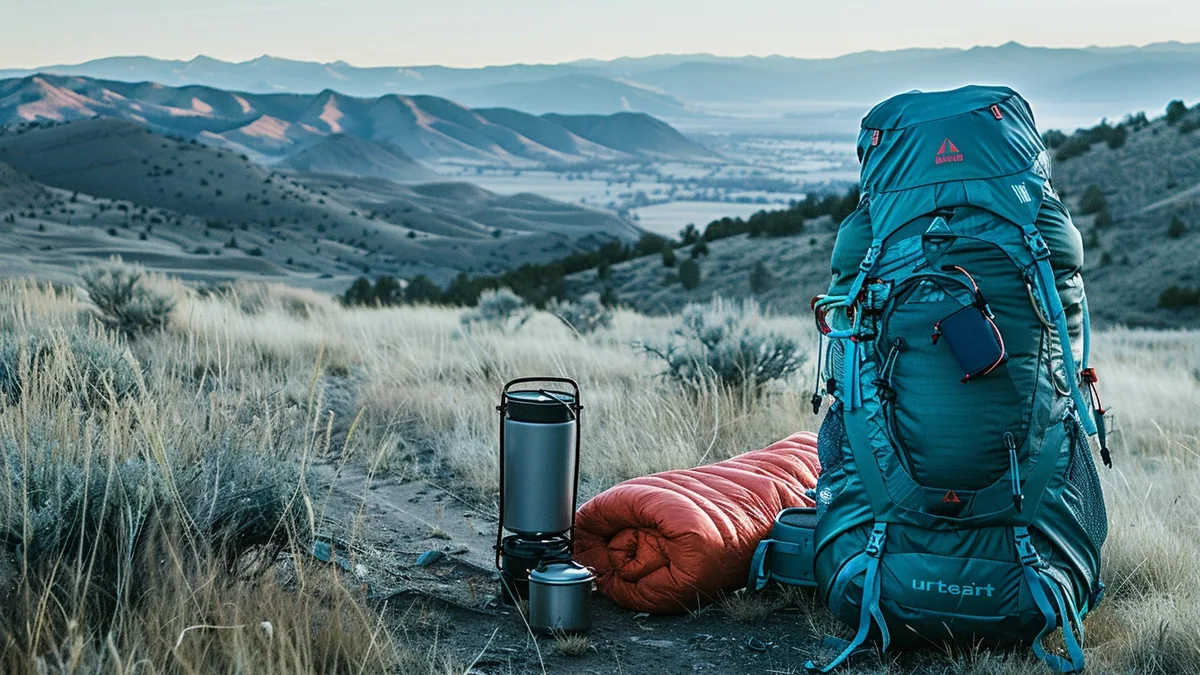
A lighter backpack changes the entire rhythm of a hike. Steep climbs feel more manageable, breaks are shorter, and you arrive in camp with more energy left to enjoy the place rather than recover from the walk. But ultralight backpacking is not about suffering with the fewest possible items.
It is about carrying only what has a clear job, choosing equipment that serves more than one purpose, and matching every decision to the route, weather, season and your own skills. This guide breaks down the essential ultralight backpacking equipment, explains where weight savings matter most, and shows how to build a kit that remains safe and comfortable.
Start with base weight, not an arbitrary number
Your base weight is everything in your pack except consumables: water, food, fuel and anything else that is used up during the trip. It includes your backpack, shelter, sleeping gear, clothing, cooking gear, navigation tools and emergency kit.
There is no universal threshold that magically makes a hiker “ultralight”. Conditions change the equation. A three-season overnight on a well-marked trail needs far less insulation and safety equipment than an autumn crossing above the tree line. The useful goal is to eliminate redundancy, not margin for safety.
| Pack approach | Typical base-weight range | Best suited to | Main trade-off |
|---|---|---|---|
| Traditional backpacking | Often above 9-11 kg | Comfort-focused trips and bulky gear | More fatigue over distance |
| Lightweight backpacking | Roughly 6-9 kg | Most three-season hikers | Requires selective purchases |
| Ultralight backpacking | Often below 6 kg | Experienced, conditions-aware hikers | Less room for “just in case” items |
These ranges are only practical reference points, not rules. A colder trip, a long dry section, bear-country requirements or medical needs can make a heavier pack the sensible choice.
The big three: backpack, shelter and sleep system
1. Choose the backpack last
This seems counterintuitive, but it prevents a common and expensive mistake. Your backpack must fit the actual packed volume and carrying weight of your final kit. Buy a large, heavily framed pack first and you may unconsciously fill it. Buy an ultralight frameless pack first and you may find it uncomfortable when carrying several days of food or extra water.
Look for:
- A fit that matches your torso, with shoulder straps that do not chafe or create pressure points.
- A load capacity suited to your heaviest likely carry, not only an easy summer overnight.
- Side pockets you can reach while walking for water, snacks and maps.
- Simple construction: fewer zips, organisers and thick fabrics generally mean less weight.
- A removable frame or hip belt only if it still supports the load you expect to carry.
A frameless pack can work very well for low base weights, particularly when a folded foam sleeping pad creates structure inside. For heavier food carries, rough terrain or sensitive shoulders, a light internal frame is often worth the small penalty.
2. Select shelter for the forecast, not social media
The lightest shelter is not automatically the best shelter. A tarp, trekking-pole tent, single-wall tent, bivy or traditional double-wall tent all have legitimate uses.
| Shelter type | Strengths | Limitations | Good fit |
|---|---|---|---|
| Tarp | Very light, versatile, spacious for its weight | Requires pitching skill; less bug and storm protection | Dry or predictable conditions |
| Trekking-pole tent | No dedicated tent poles; efficient weight | Needs compatible poles and a suitable pitch | Three-season walkers |
| Single-wall tent | Compact and fast to pitch | Condensation management is essential | Dry climates or ventilated camps |
| Double-wall tent | Better separation from condensation, strong bug protection | Usually heavier | Humid, buggy or changeable routes |
| Bivy | Minimal bulk and quick setup | Restrictive; can collect condensation | Backup, fast-and-light or very sheltered use |
A waterproof shelter must be paired with site selection. Avoid depressions where cold air and water settle, look for drainage after rain, and respect local rules on camping and fire risk. In exposed environments, know how to pitch your shelter securely before the trip.
3. Build a sleep system as a set
A sleep system has three linked parts: sleeping bag or quilt, sleeping pad, and shelter or ground protection. A warm quilt paired with an inadequately insulated pad can still leave you cold because the ground draws heat away from your body.
For a three-season setup, prioritise:
- A temperature rating appropriate for the coldest expected overnight low, with a personal safety margin if you sleep cold.
- A sleeping pad with enough insulation for the ground conditions, not merely enough softness.
- A lightweight groundsheet only when your shelter requires it or the ground is abrasive or wet.
- Dry sleep clothes: a dedicated pair of socks and a light base layer can noticeably improve comfort.
Down insulation is highly compressible and durable when cared for, but it must be protected from moisture. Synthetic insulation is bulkier for equivalent warmth but remains more forgiving in persistently damp conditions. Store either in a waterproof liner or reliable dry bag inside the pack.
Clothing: wear a system, not a suitcase
Ultralight clothing works best as layers. The aim is to remain dry and regulate heat while moving, then add insulation quickly when you stop. Packing duplicate outfits for every day rarely makes sense on a multi-day hike.
A dependable three-season clothing system includes:
- A breathable hiking shirt or sun hoodie.
- Shorts, trousers or a skirt appropriate for vegetation, sun and temperature.
- Underwear and socks, with one dry pair reserved for sleeping if conditions are cold or wet.
- A warm mid-layer, such as fleece or a lightweight insulated jacket.
- A wind layer or rain shell selected for the forecast and exposure.
- A warm hat and gloves when evenings, elevation or weather warrant them.
- Sun protection: cap, sunglasses and sunscreen.
Choose fabrics that dry quickly and stay comfortable when damp. Avoid relying on cotton in cool or wet conditions because it dries slowly and can chill you when you stop.
Do not confuse “packable” with “protective”
An ultra-thin rain jacket may be fine for brief showers on a warm, sheltered trail. It may not be enough for hours of wind-driven rain. Similarly, a very light insulated jacket can be excellent at camp in summer but insufficient during an unplanned stop in cold weather. Match waterproofing, breathability and warmth to the route’s consequences.
Water, food and cooking essentials
Water is one of the heaviest items in any pack, so a good water plan saves more effort than buying an exotic titanium accessory. Study reliable sources along the route, seasonal availability, water quality warnings and the distance between refills.
Carry:
- Enough container capacity for the longest dry stretch, not just the next stream.
- A filtration or treatment method appropriate to local water risks.
- A backup treatment option when a failure would leave you without safe water; this can be compact purification tablets, depending on your needs and local guidance.
- A wide-mouth bottle or bag that is easy to fill and clean.
Filters are convenient but can be damaged by freezing and may clog in silty water. Chemical treatments are light but can require waiting time and may be less suitable for all contaminants. Boiling is effective when done correctly but consumes fuel and time. Check public-health and land-management guidance for your destination.
Keep cooking simple
For many overnights, a small stove, fuel, lighter, compact pot and spoon are enough. One-pot meals reduce dishes, fuel use and washing-up water. Cold-soaking can remove the stove entirely on warm trips, but it is not ideal when hot food or drinks are important for morale and warmth.
Food choices should deliver plenty of energy without excess packaging or water weight. Useful staples include dehydrated meals, oats, nuts, nut butter, couscous, instant mashed potatoes, dried fruit, tortillas and energy-dense snacks. Repackage food into labelled bags, while keeping any required bear-resistant container or food-storage system for the area.
Navigation, safety and hygiene: the non-negotiable core
Ultralight does not mean leaving behind the means to navigate, communicate and handle a minor emergency. The exact kit depends on remoteness, group size, weather and your experience, but these items deserve deliberate choices.
Navigation and communication
Use a smartphone with offline maps as a helpful tool, not your only plan. Bring a power bank and cable sized for the trip, keep the phone protected from rain, and download maps before losing signal. On remote routes, a paper map and compass remain valuable backups-provided you know how to use them.
A satellite communicator or personal locator beacon can be appropriate where mobile coverage is unreliable and consequences are high. It does not replace route planning, but it can provide emergency contact capability. Learn its functions, subscription terms and local rescue procedures before departure.
First aid and repair
A compact first-aid kit should be tailored to likely problems and personal medical needs. Typical contents include blister care, adhesive bandages, wound-cleaning supplies, pain relief if medically suitable, personal medication and any allergy or asthma treatment you need. Know how to use what you carry.
A minimal repair kit might include durable tape wrapped around a bottle or trekking pole, a needle and thread, a few zip ties, cordage, a spare pack-buckle solution if relevant, and a patch kit for an inflatable pad. Add equipment-specific repair parts only where failure is plausible and consequential.
Hygiene and Leave No Trace
Pack a small trowel where catholes are permitted, toilet paper or an alternative, hand sanitiser, and a sealable bag for all waste that must be carried out. Local rules can require packing out human waste entirely, especially in alpine, desert or heavily visited locations.
Keep campsites clean, use existing durable surfaces, follow fire restrictions, and never assume that a lightweight kit gives permission to camp anywhere. The least impactful overnight is often the best one.
A practical ultralight packing checklist
Use this checklist as a starting point, then remove or add items based on your route. Weighing gear is useful because assumptions are often wrong; kitchen scales are adequate for small items, while a luggage scale can weigh the finished pack.
| System | Essential items | Question to ask before packing |
|---|---|---|
| Carry | Pack, pack liner, optional rain cover | Will it carry my maximum food and water load comfortably? |
| Shelter | Tent/tarp/bivy, stakes, guylines, groundsheet if needed | Can I pitch it on the terrain and in the expected wind? |
| Sleep | Quilt or bag, insulated pad, sleep clothes | Is the whole system warm enough for the coldest night? |
| Clothing | Worn layers, insulation, rain/wind layer, sun protection | What happens if I stop wet in the evening? |
| Water and food | Bottles, treatment, food, stove/fuel if used | What is the longest reliable gap between water sources? |
| Safety | Map, compass, phone, power bank, light, first aid, repair kit | Can I navigate and manage a delay after dark? |
A headlamp is worth including even for a planned daytime hike. Delays happen: a missed turn, a slow descent, a blister, a storm or helping another walker can turn a short day into a late arrival.
Save weight in the right order
The most effective ultralight strategy is not to replace every item at once. First, inspect what you already own. Remove duplicates, unnecessary packaging, oversized toiletries and unused “maybe” items. Then target the equipment that is both heavy and central to your system.
A smart order of operations is:
- Audit your current gear by weighing every item and recording it in a simple list.
- Eliminate redundant items and choose multipurpose gear, such as trekking poles that also support a compatible shelter.
- Improve the big three one piece at a time, only after confirming your actual conditions.
- Reduce consumables through better route planning: food portions, fuel needs and water capacity.
- Test the full kit on an easy overnight before using it far from help.
Buying used equipment, borrowing gear or renting specialist items can be an excellent way to test a tent, quilt or backpack before investing. The lightest premium materials can be costly and may require gentler handling; durability and repairability have real value on frequent trips.
Common ultralight mistakes to avoid
The pursuit of a low number on a gear spreadsheet can lead to poor decisions. Avoid these frequent errors:
- Cutting insulation too aggressively. Being cold reduces sleep, judgement and morale.
- Using a tiny pack that cannot handle water carries. Water capacity is dictated by terrain, not base weight.
- Relying on a phone without offline maps, power or backup navigation skills.
- Skipping rain protection because the morning forecast looks clear. Mountain and coastal weather can change quickly.
- Taking unfamiliar gear on a high-consequence route. Practice pitching, filtering water and using your sleep system close to home first.
- Ignoring regulations. Food storage, fires, camping and waste rules may require specific equipment.
- Copying someone else’s kit exactly. Body temperature, experience, terrain and risk tolerance differ widely.
Adapt the kit to the trip
A gear list is only useful in context. Add warmth, traction, navigation redundancy and emergency capacity as remoteness and exposure increase. On a humid route, favour ventilation and waterproof packing. On a route above the tree line, consider wind resistance and a shelter that can handle exposed pitches. On an arid route, carrying capacity for water can outweigh every other optimisation.
For a first ultralight trip, choose a familiar, well-marked route with easy bail-out options and a mild forecast. You will learn more from one calm overnight with a fully tested kit than from reading dozens of minimalist packing lists.
In practice
Build your featherweight kit around safe sleep, reliable shelter, water treatment, navigation and weather protection. Weigh what you already own, strip out duplication, and focus upgrades on the backpack, shelter and sleep system before chasing tiny accessories.
Most importantly, let the route make the decisions. A truly efficient ultralight pack is not the lightest possible pack: it is the lightest kit that keeps you warm, hydrated, oriented and capable when the plan changes.
Questions fréquentes
What is considered ultralight backpacking?
Ultralight backpacking usually refers to reducing base weight-the gear carried excluding food, water and fuel-to a very low level, often below roughly 6 kg. There is no official universal cutoff, and a safe target depends on the season, route, climate and required safety equipment.
What are the big three items in ultralight backpacking?
The big three are the backpack, shelter and sleep system. They typically make up the largest share of a backpacking kit’s base weight, so thoughtful choices in these categories deliver much larger savings than trimming small accessories.
Is ultralight backpacking safe for beginners?
It can be safe when beginners start conservatively on familiar, low-risk routes and retain essential insulation, navigation, water treatment and emergency supplies. Do not remove protective gear simply to meet a target weight; test a lighter setup on short trips before heading into remote terrain.
Do I need a tent for ultralight backpacking?
Not always. A tarp, trekking-pole shelter or bivy can be suitable in the right conditions, but a tent often provides better bug, rain and condensation protection. Choose shelter based on the expected weather, terrain, regulations and your ability to pitch it securely.
How can I make my backpacking pack lighter without buying new gear?
Weigh every item, remove duplicates, repackage food and toiletries, carry only the water capacity your route requires, and use items with more than one purpose where appropriate. Planning meals, water stops and clothing layers carefully often saves meaningful weight at no cost.
Should I carry a paper map when using a hiking app?
For remote, complex or high-consequence routes, a paper map and compass are wise backups to an offline map app. Phones can run out of battery, break, get wet or lose GPS reliability, so carry navigation tools you know how to use.
À lire aussi
Dans la même veine
Babyfoot pro occasion : trouvez la perle rare pour vos tournois à domicile
Babyfoot pro occasion : apprenez à contrôler le modèle, l’état et le transport pour dénicher une table fiable, durable et prête pour vos tournois conviviaux à domicile.
Comment apprendre à jouer au mölkky, le jeu finlandais d’extérieur
Comment apprendre à jouer au mölkky : règles, installation, comptage des points, techniques de lancer et stratégies simples pour réussir vos parties dehors.

Comment apprendre la jonglerie en 5 étapes simples ?
Apprenez la jonglerie en 5 étapes simples : matériel, lancer précis, croisement des balles et routine pour progresser sans vous décourager durablement.